User manual
Taking a test
This page will explain the entire test-taking process from a student’s perspective.
- Accessing a test
All tests assigned to a specific student are available in the My assignment tab. For more information on available options within this tab, please visit Assignments help page.
Before starting the test, it is necessary to agree with the given instructions. You should:
- Select a checkbox to agree with the instructions and rules.
- Click the "Start" button.
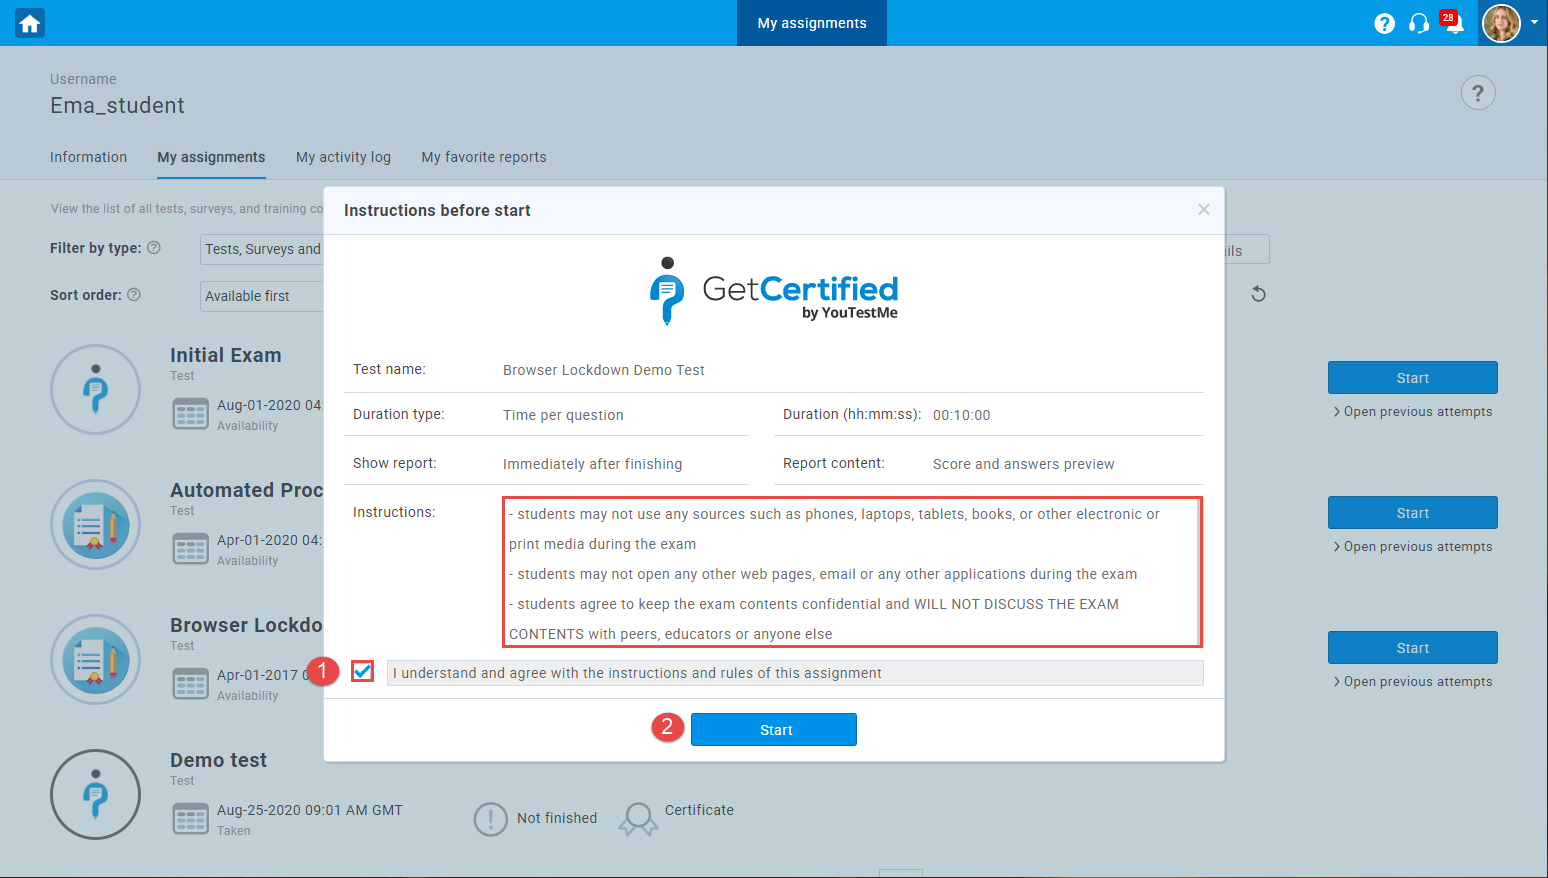
This pop-up window also contains other information related to the test-taking process, such as:
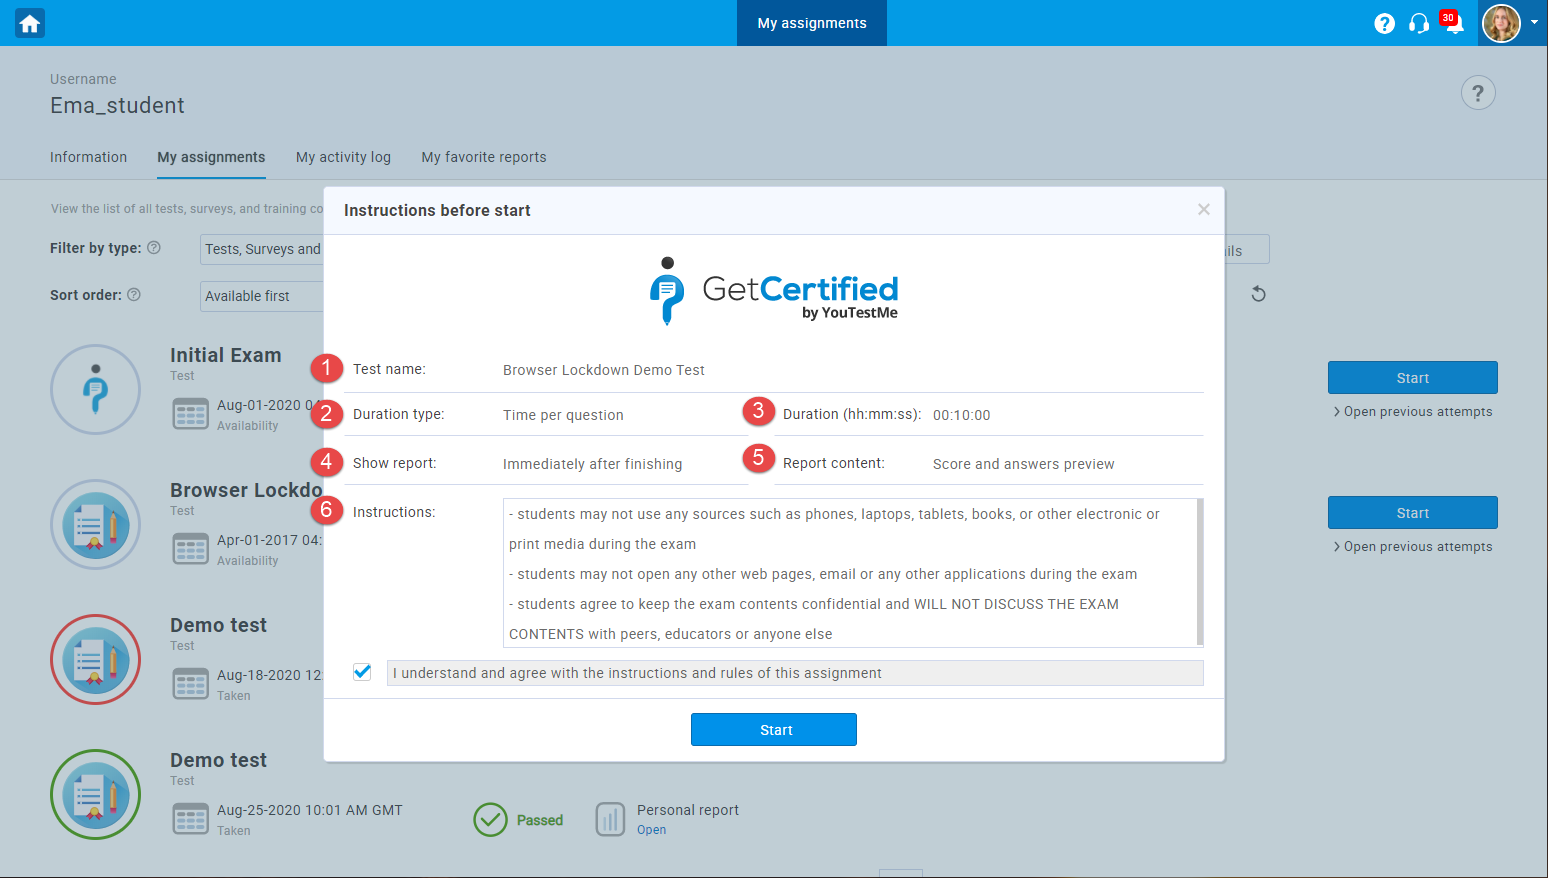
- "Test name" - the name of the test you will start.
- "Duration type" - specifies whether you have unlimited time to complete the test or you have a time limit set for each question/entire test.
- "Duration" - total time available for completing the test.
- "Show report" - specifies whether the report will be available immediately upon the test completion or after the manager’s approval.
- "Report content" - specifies whether the report will contain only the scores or both scores and question answers.
- "Instructions" - important rules, instructions, or notes that need to be acknowledged before starting the test.
Note: Some question types, such as essays, require manual grading by an instructor/manager. Thus, the results of tests that contain this question type cannot be immediately displayed.
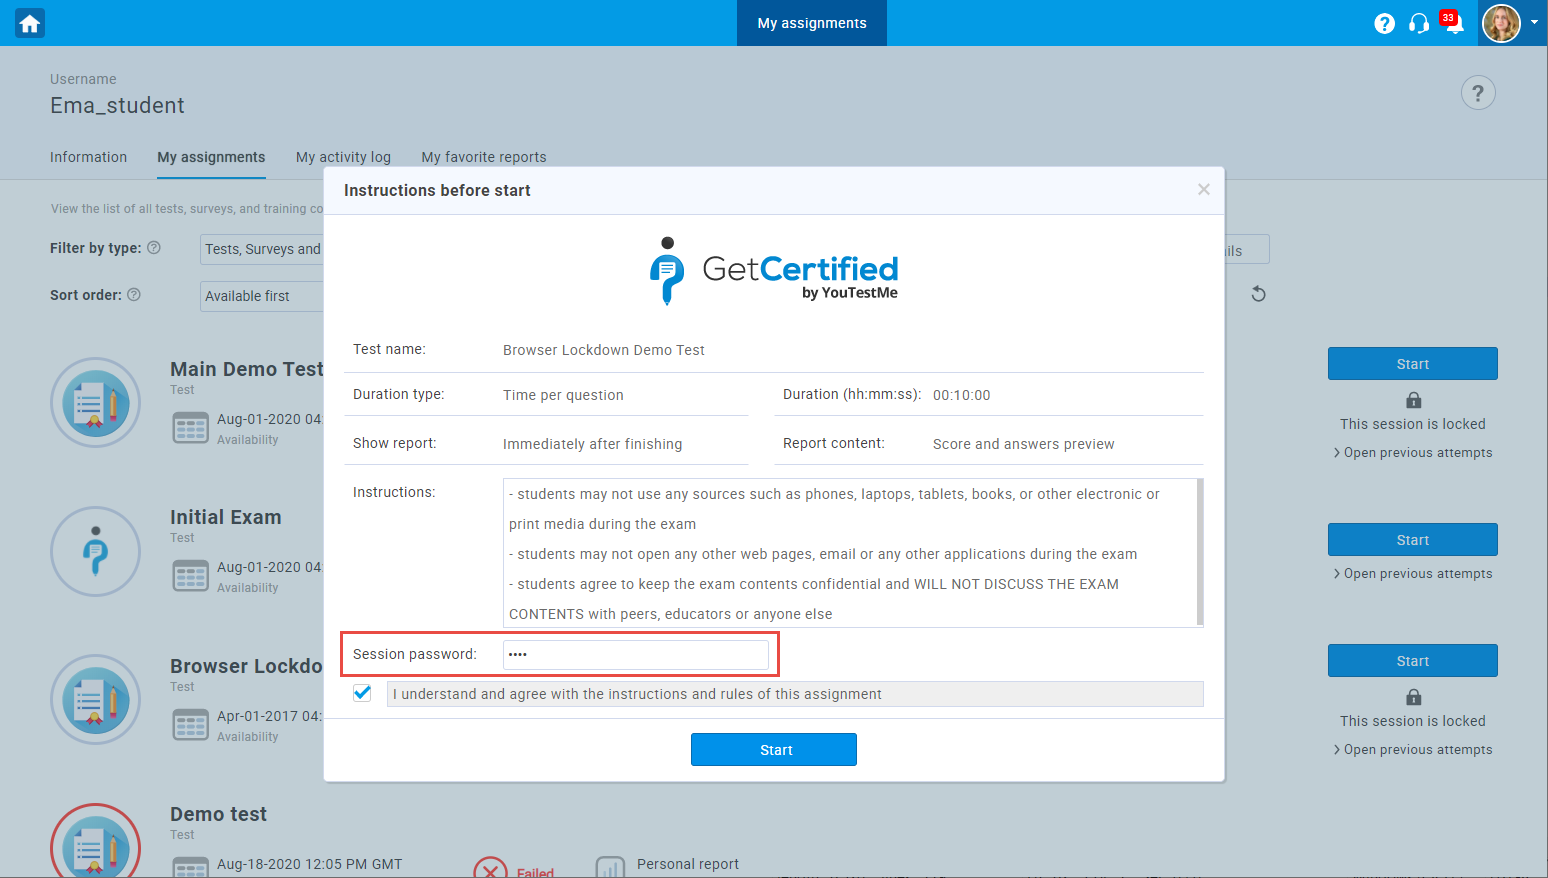
When initiating a test, additional fields and pop-ups may appear if the following options are enabled during the test creation:
- The testing session is locked - when a testing session is locked,
you need to enter a password to start the test.
The field for entering the password is in the same window with the test name, duration and instructions.
The test instructor should provide you with a password for unlocking the test. If you have not received the password, contact the instructor.
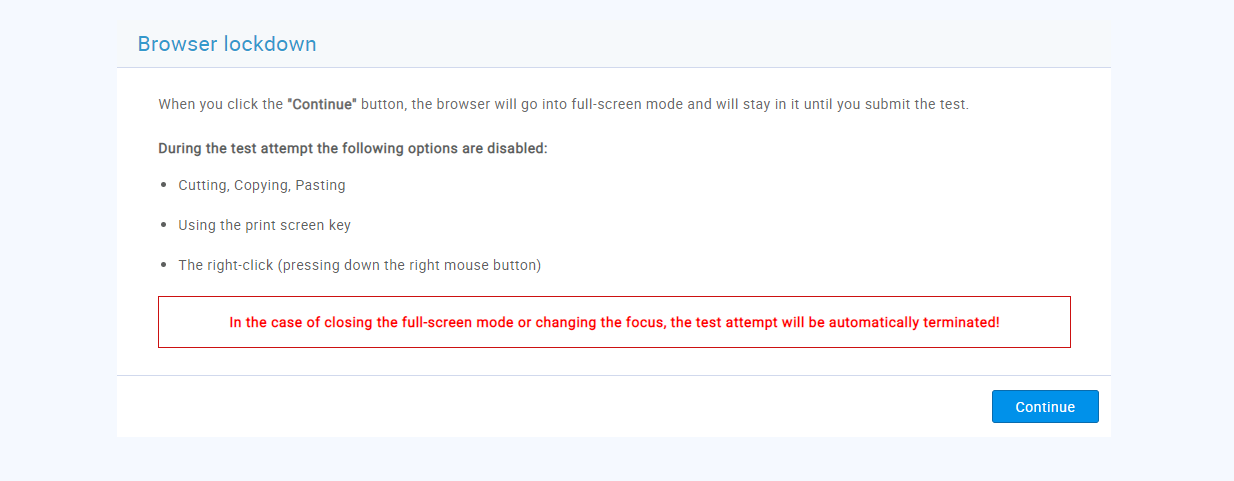
- The "Enable browser lockdown" option is enabled - a window will appear informing you that copying,
cutting, pasting, using the Print Screen button and the right mouse button are not allowed.
Also, closing the full-screen mode or changing the focus will automatically terminate the test attempt.
To start the test, you should click the "Continue" button.
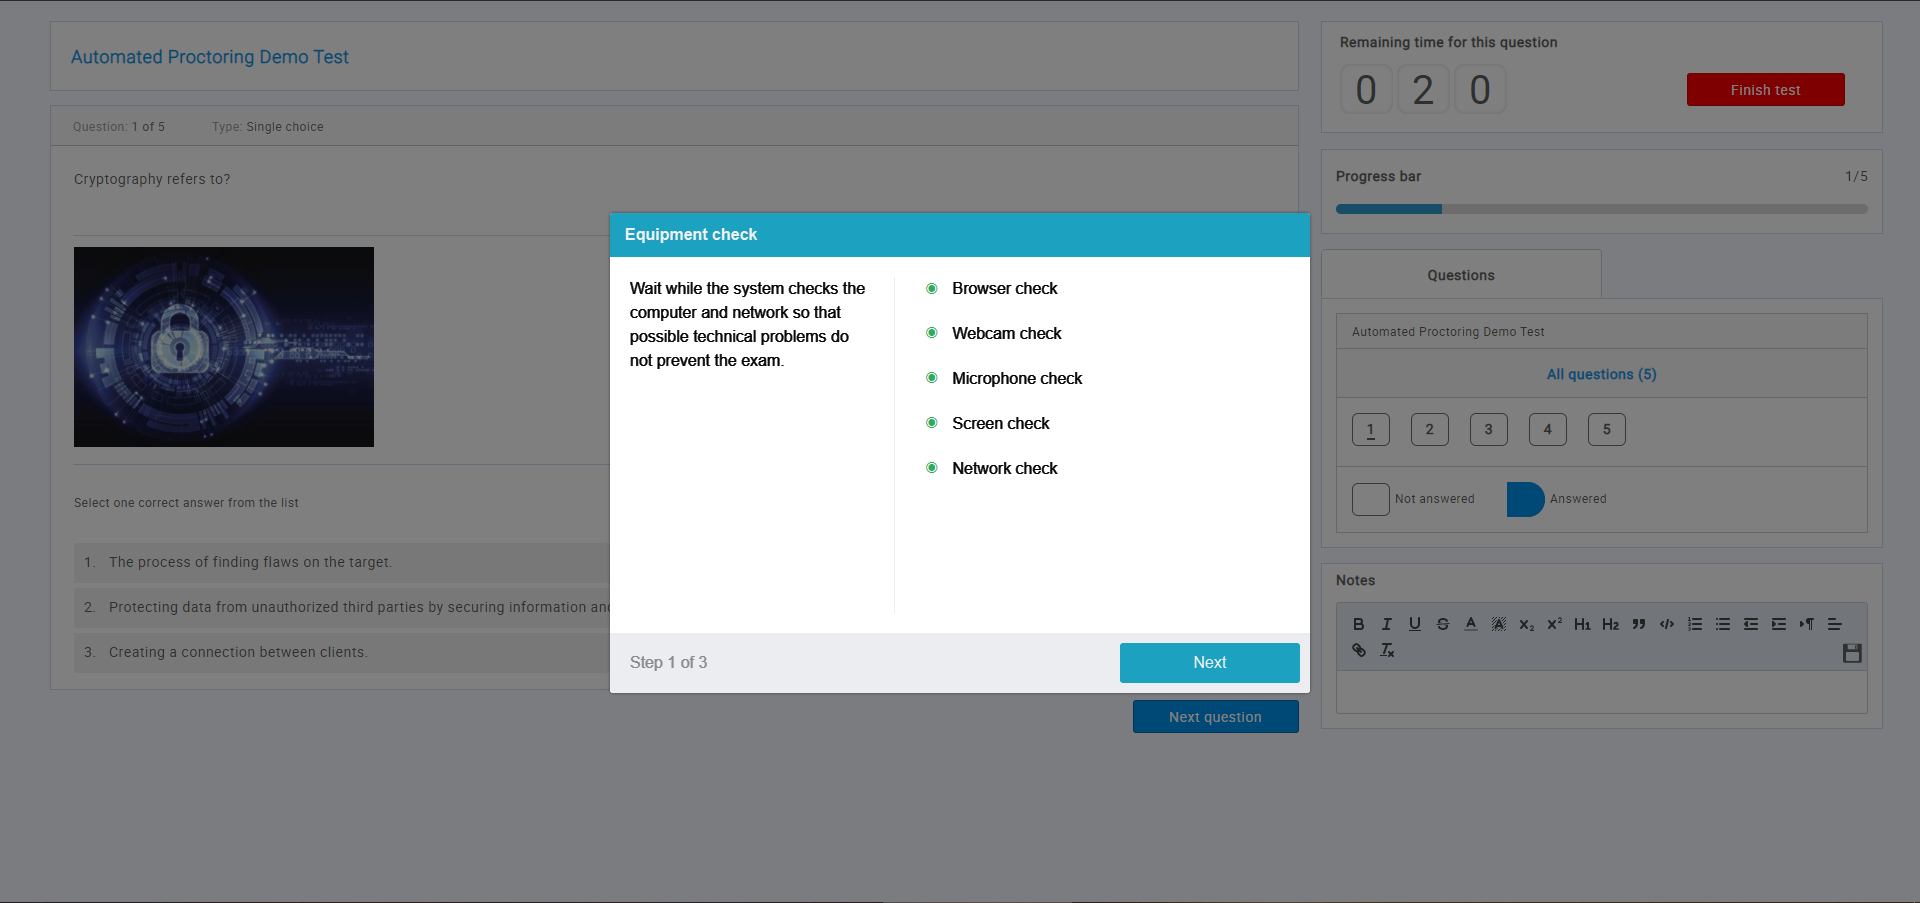
- The "Proctoring mode" is enabled - once you accept the test instructions, a pop-up for equipment check will appear.
The system will check if the browser is in full-screen mode and whether the microphone,
camera, and internet connection are in order.
Note: You should allow the usage of camera, microphone, and screen share in case this pop-up appears.
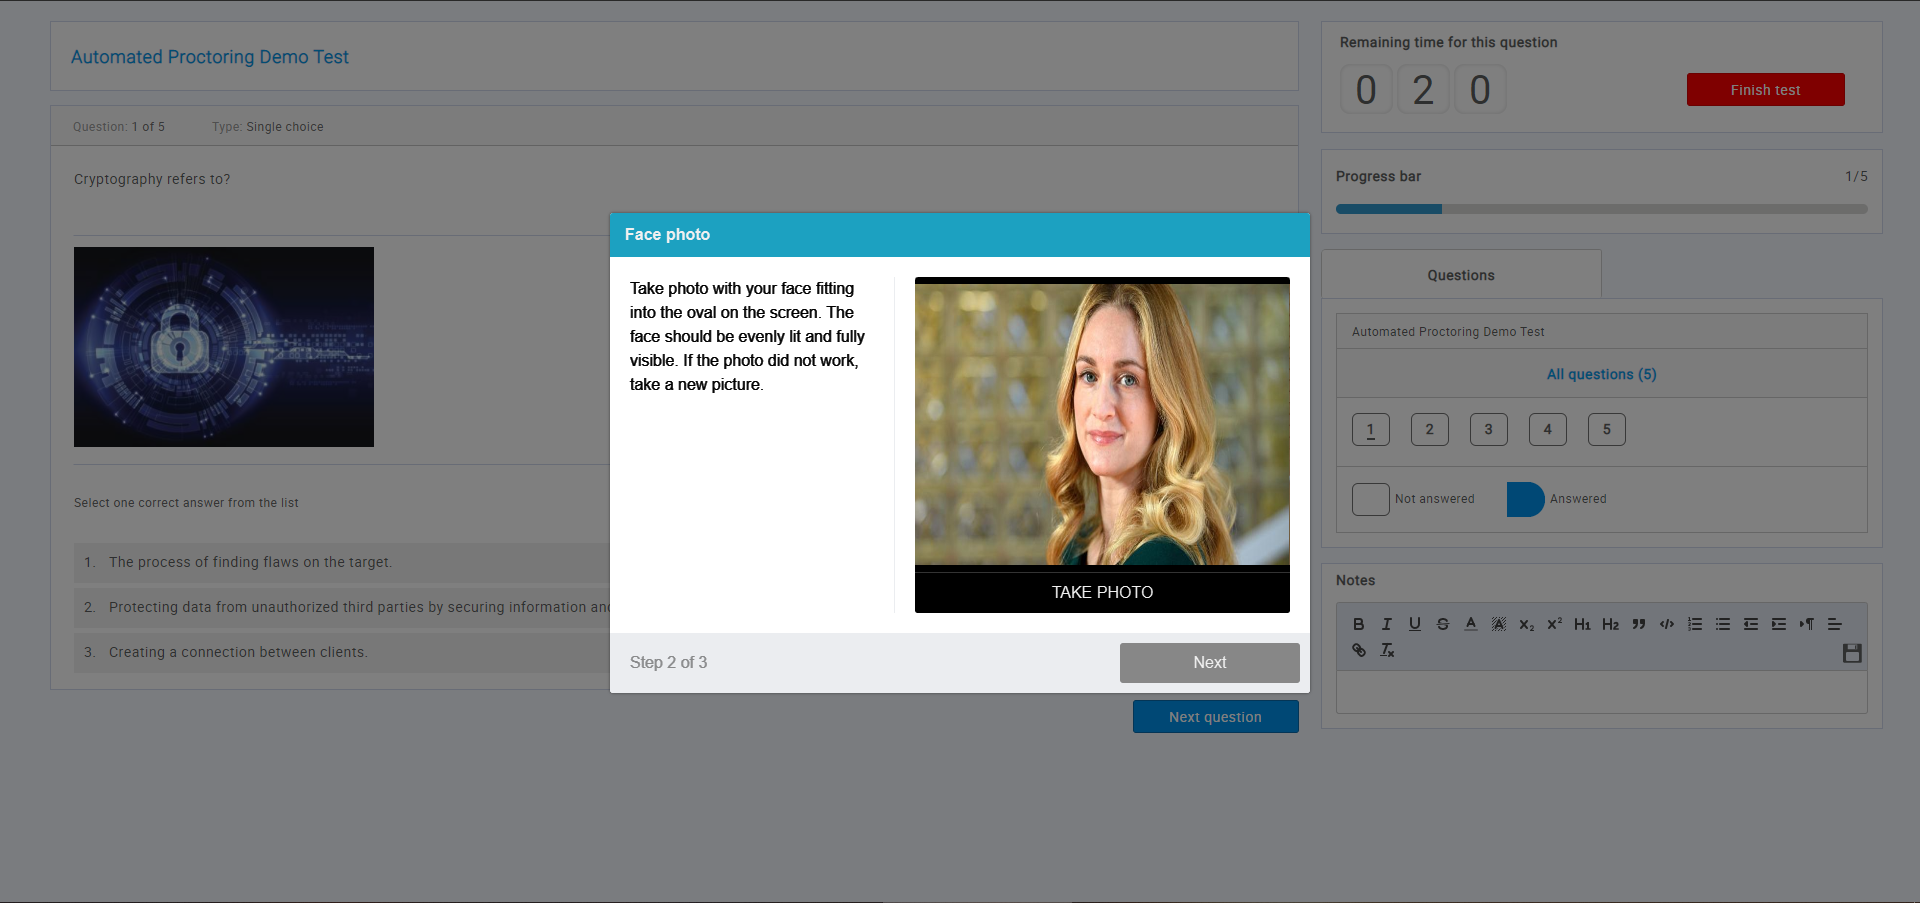
In the next step, the system will take your picture in order to compare it constantly to the person in front of the camera during the test and validate your test attempt.
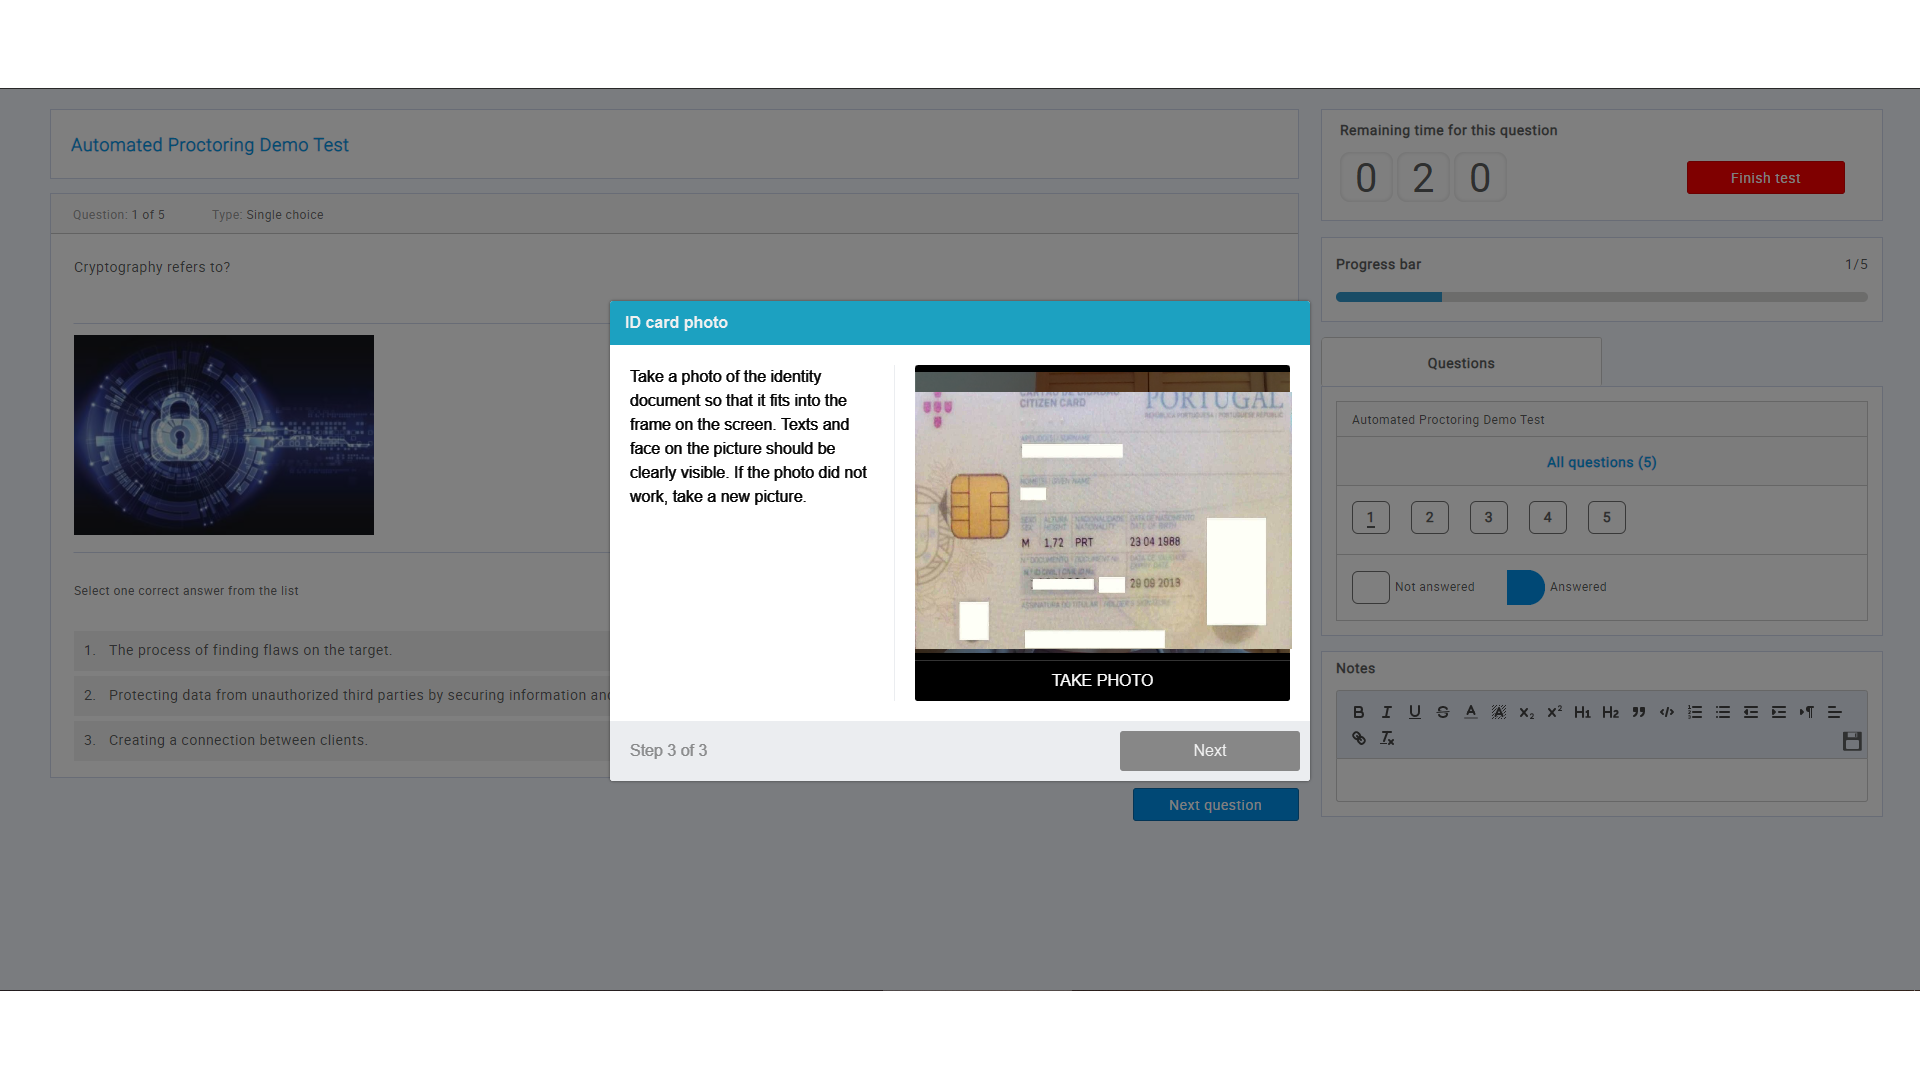
The last step is to take a picture of your ID document to confirm that you are the person who is doing the test.
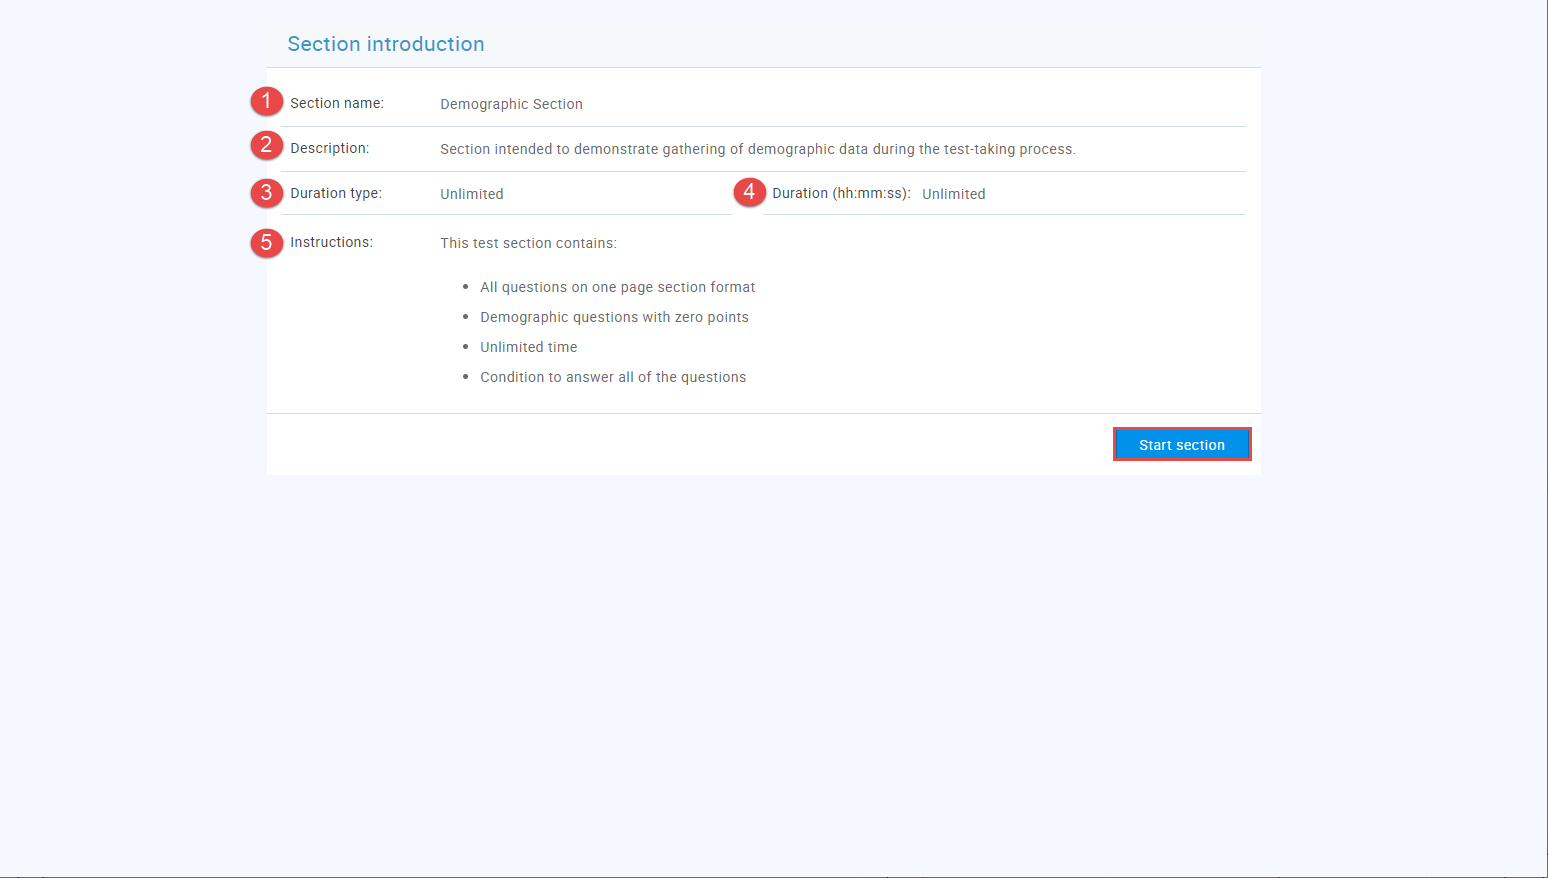
- The test has one or more sections -
if a test has one or more sections, a window with the following information will appear at the beginning of each section:
- "Section name" - the name of the section you will start.
- "Description" - more information about the section.
- "Duration type" - specifies whether you have unlimited time to complete the test or you have a time limit set for each question/section/test.
- "Duration" - available time for completing the entire section.
- "Instructions"- important rules, instructions, or notes that need to be acknowledged before starting the test.
To start the section, click the "Start section" button.
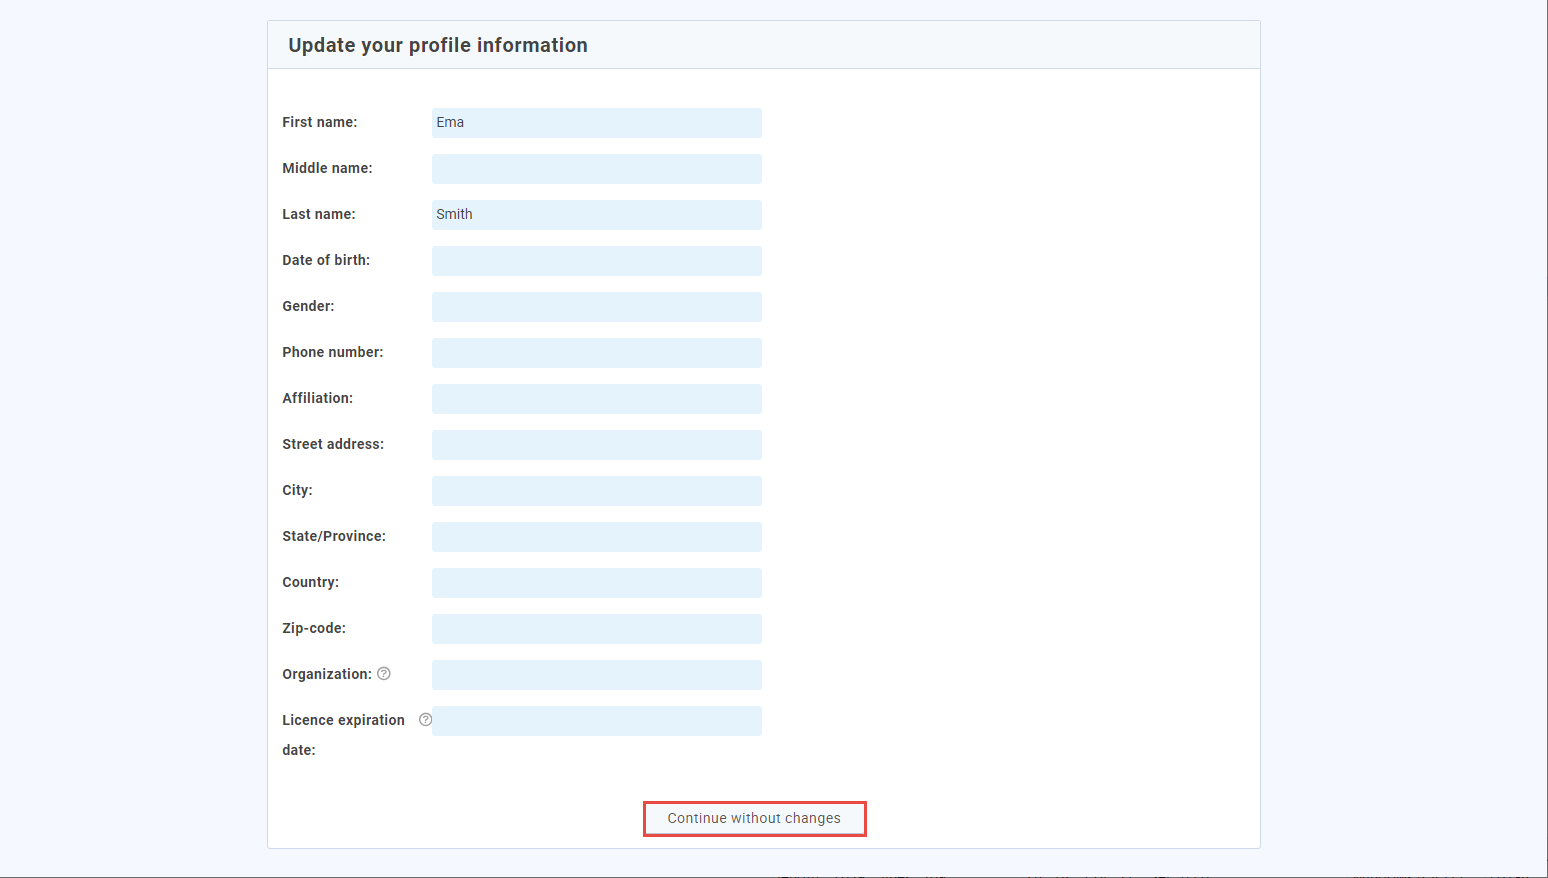
- The "Require updating profile information" option is enabled - when you accept the test instructions,
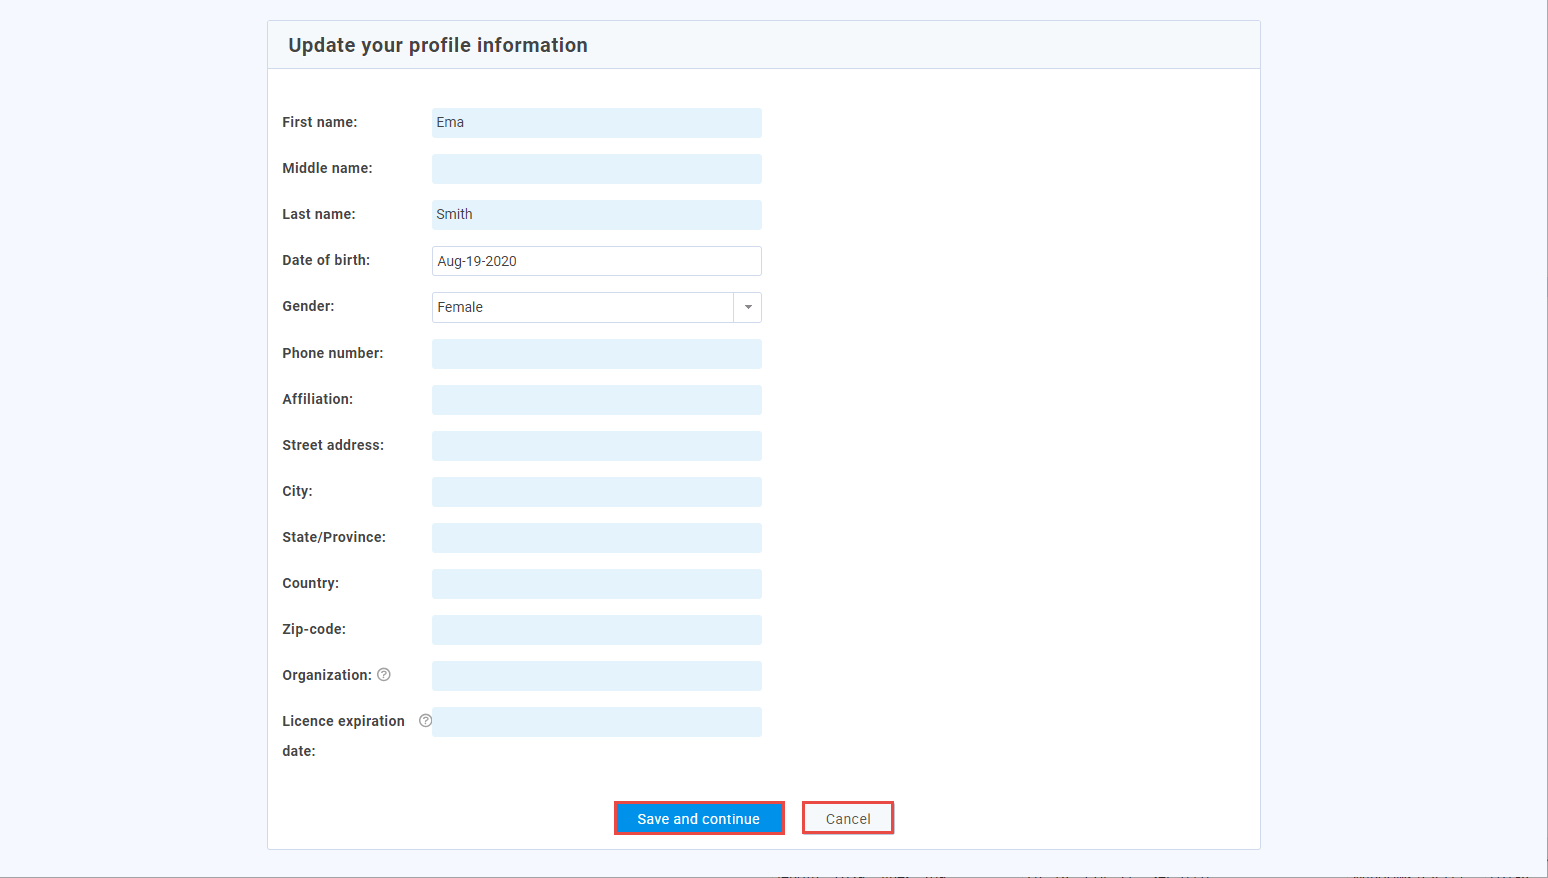
a pop-up for updating your personal information will appear where you can:
- "Continue without changes" - if you have not made any changes, click this button.
- "Save and continue" - this button will appear after you have changed any information. Click it to save the changes and start the test.
- "Cancel" - this button will appear after you have changed any information. Click it to discard the changes you have made. To start the test, you should also click the "Continue without changes" button.
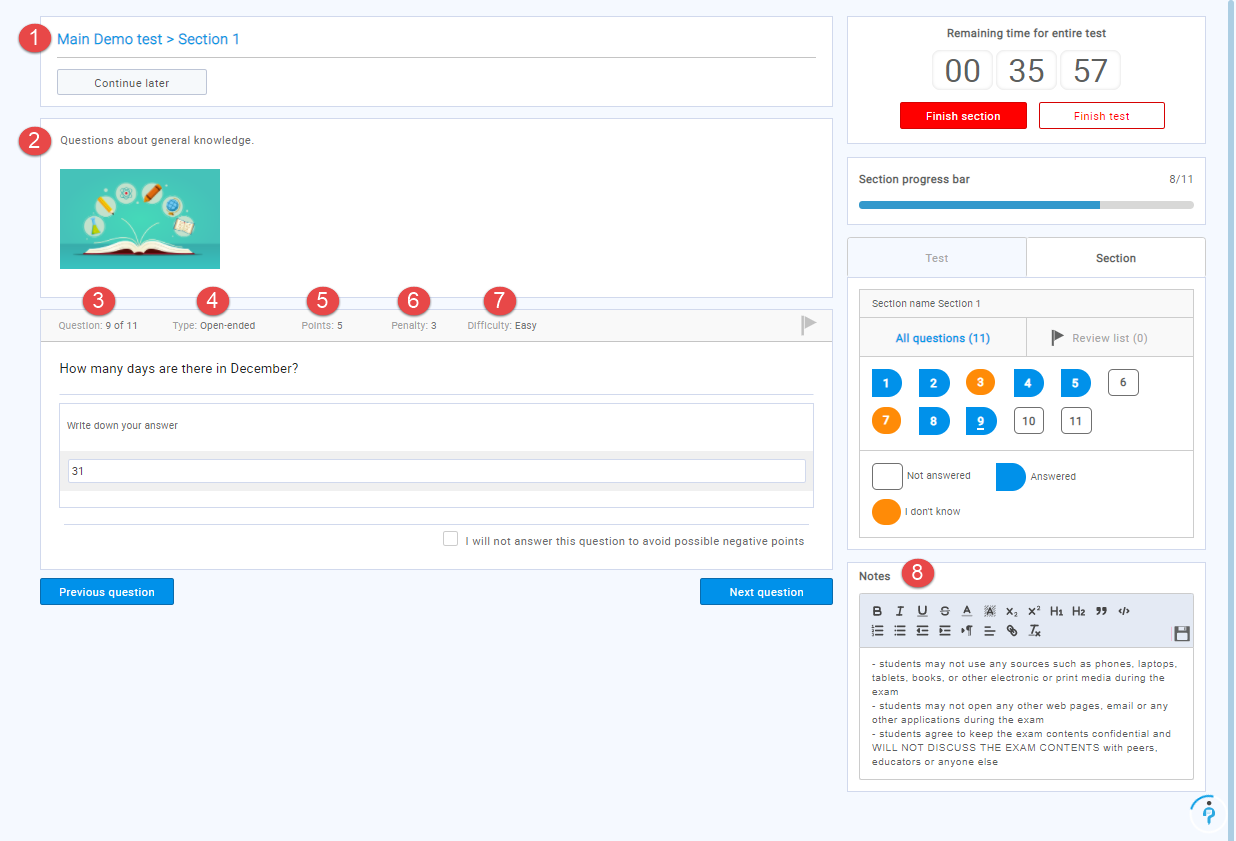
This help section will explain the most common and important options and information for test-taking.
- Question information
- Name of the test and section (if any) the question belongs to.
- The place where multimedia files (image, audio, video) important for the question will appear.
- Ordinal number of the question and the total number of questions.
- Type of question - specifies whether a question is a single choice, multiple choice, essay, ordering, fill in the blanks, true/false, matching, matrix, open-ended, or hotspot question.
- The number of points you earn when you answer the question correctly.
- The number of negative points you earn when you answer the question incorrectly.
- The difficulty of the question - easy, medium, and difficult.
- Rules, instructions, and notes you have accepted at the beginning of the test. You can delete the text in this field and write down the useful notes visible only to you.
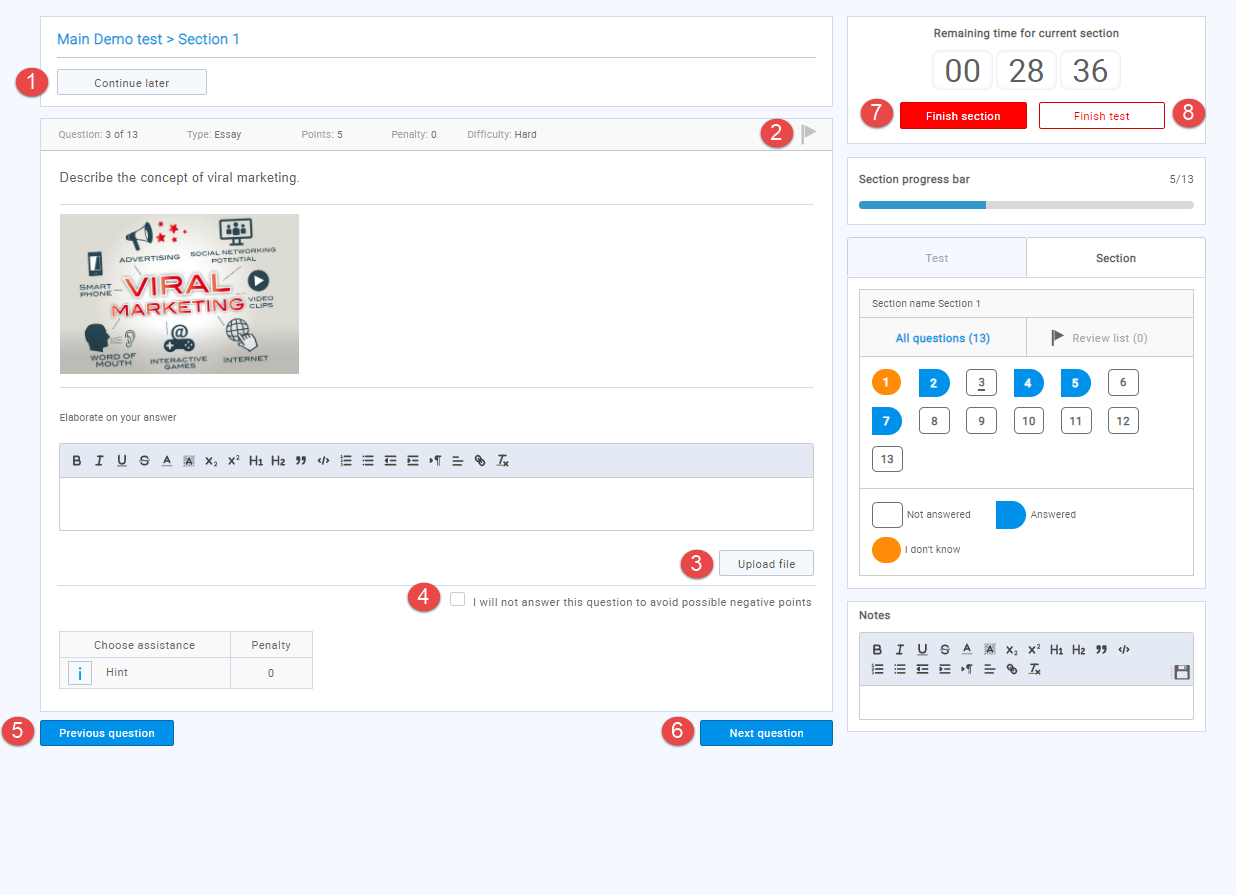
- Main buttons
- "Continue later" - click this button to exit the test and take a pause. You can continue the test later while it is still available. All previous answers will be saved.
- "Flag" - click on the flag to mark the question you want to return to later by clicking the "Review list" button.
- "Upload file" - click this button to answer the question with a table, picture, or diagram.
- "I will not answer this question to avoid possible negative points" - click this button to skip the question and avoid earning possible negative points.
- "Previous question" - click this button to return to the previous question. This button will be displayed only if the option is allowed during the test creation.
- "Next question" - click this button to move on to the next question.
- "Finish section" - click this button when you want to finish the section. This button is displayed only if the test has multiple sections.
- "Finish test" - click this button to complete the test.
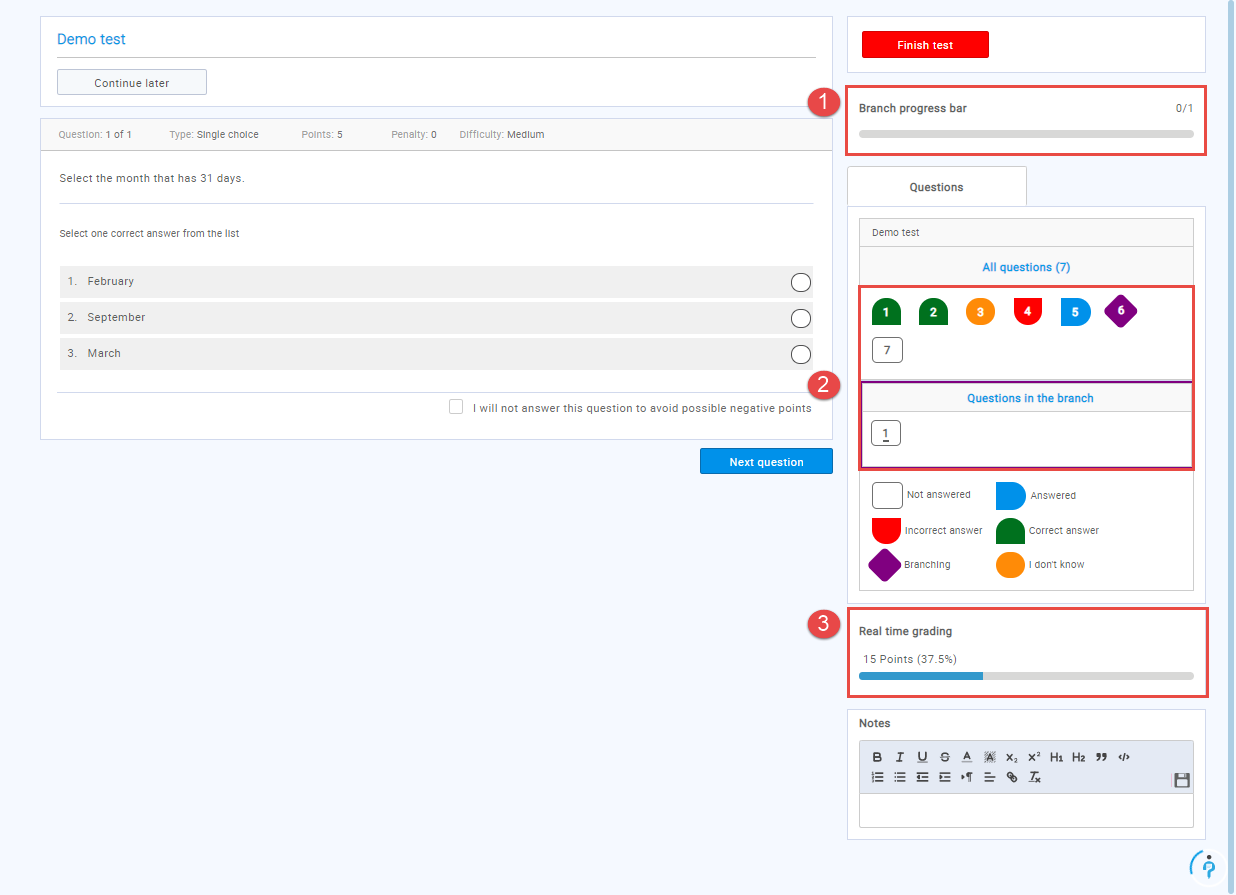
- Progress bar
- The bar visually represents how many questions were answered out of the total number of questions (in a branch or entire test).
- The symbols and colors specify the status of each question:
- White field - the question is not answered.
- Yellow field - the question is skipped because the "I don't know" option was selected.
- Blue field - the question is answered.
Note: When the "Real-time grading" option is enabled, the field will be blue when the instructor must rate the question.
- Green field - the question is answered correctly. This color is used only when the "Real-time grading" option is enabled.
- Red field - the question was answered incorrectly. This color is used only when the "Real-time grading" option is enabled.
- Purple field - the question represents the branch (follow-up question) of the previous question. - The bar displays the current success on the test (number of achieved points or percentage of completed questions). This field is only available when the "Real-time grading" option is enabled.
- Depending on the test settings, you may have:
- Unlimited time to answer questions.
- Time limit for completing the entire test
- Time limit for completing each section.
- Time limit for answering each question.
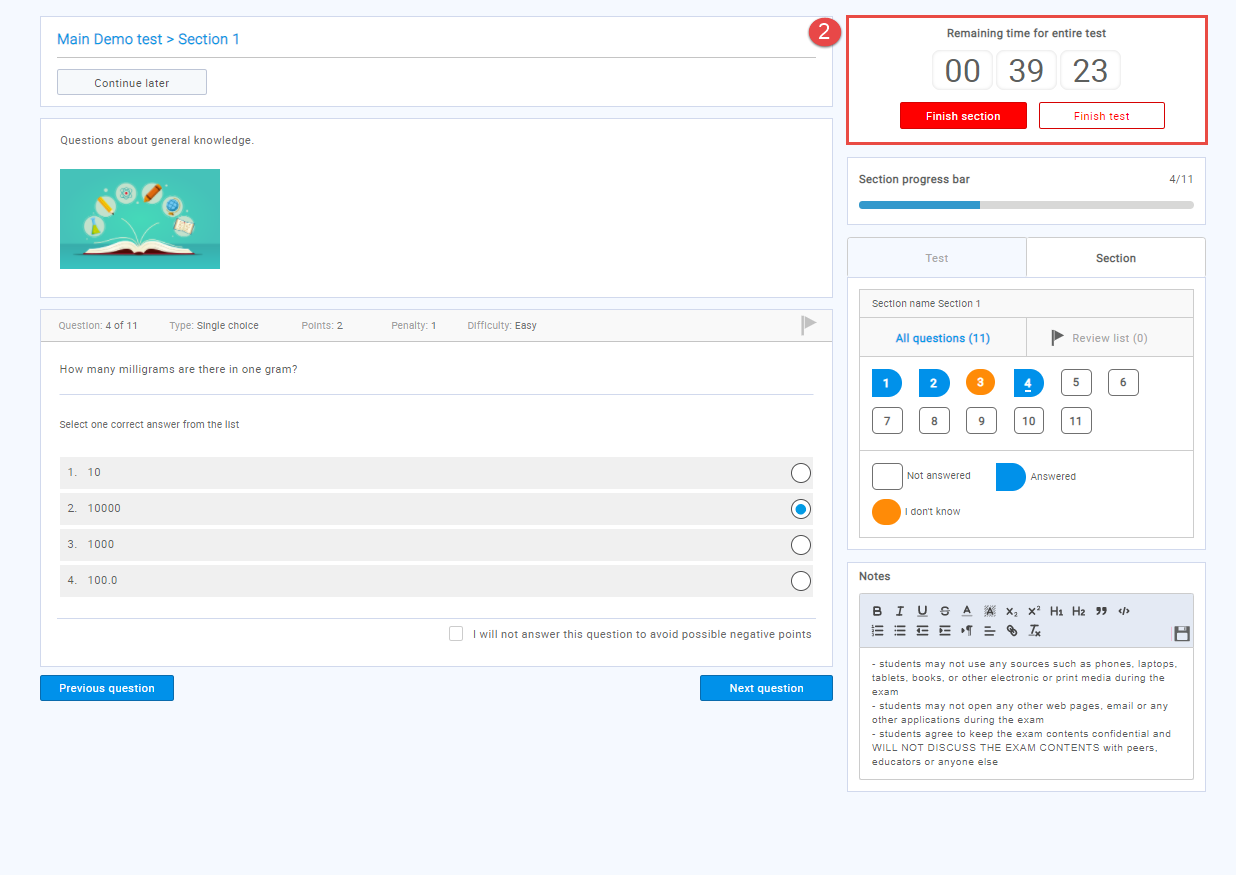
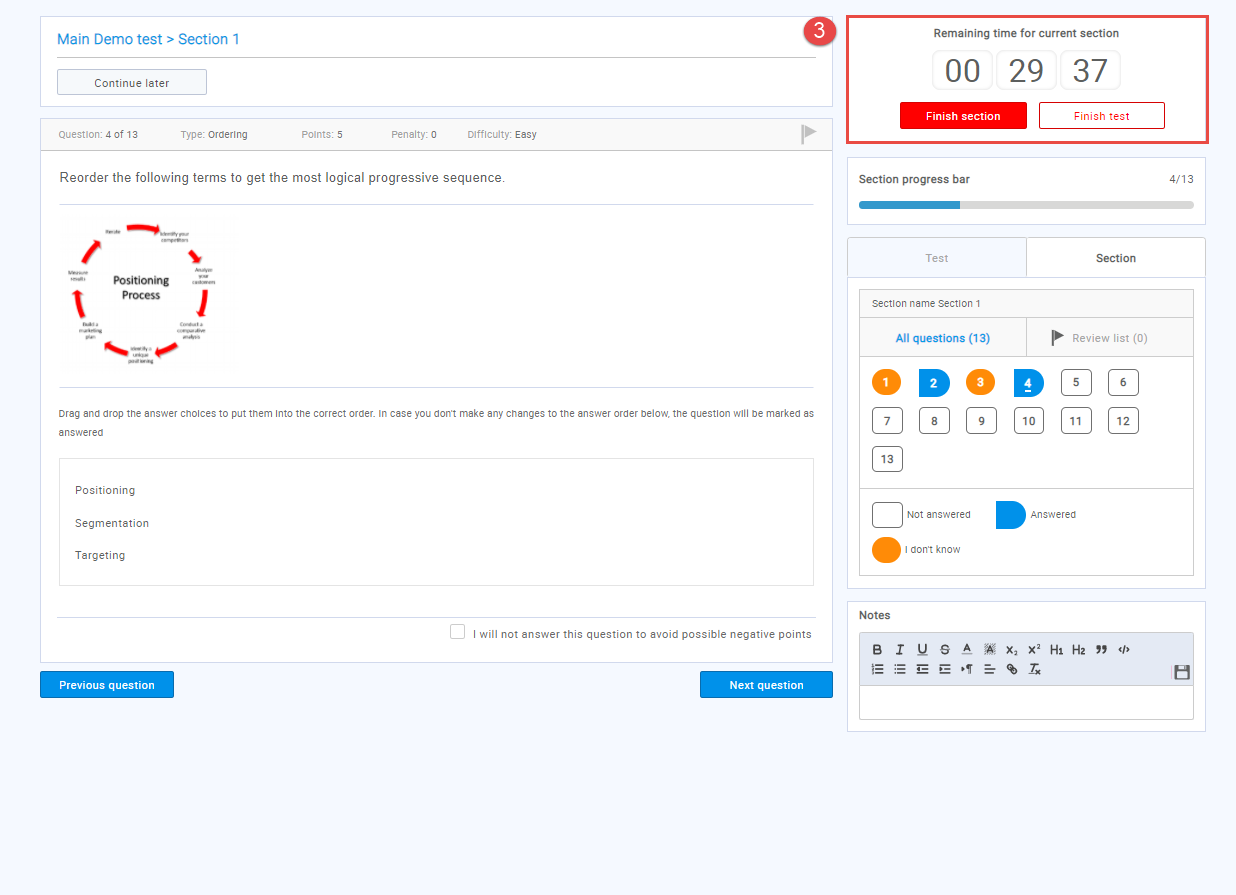
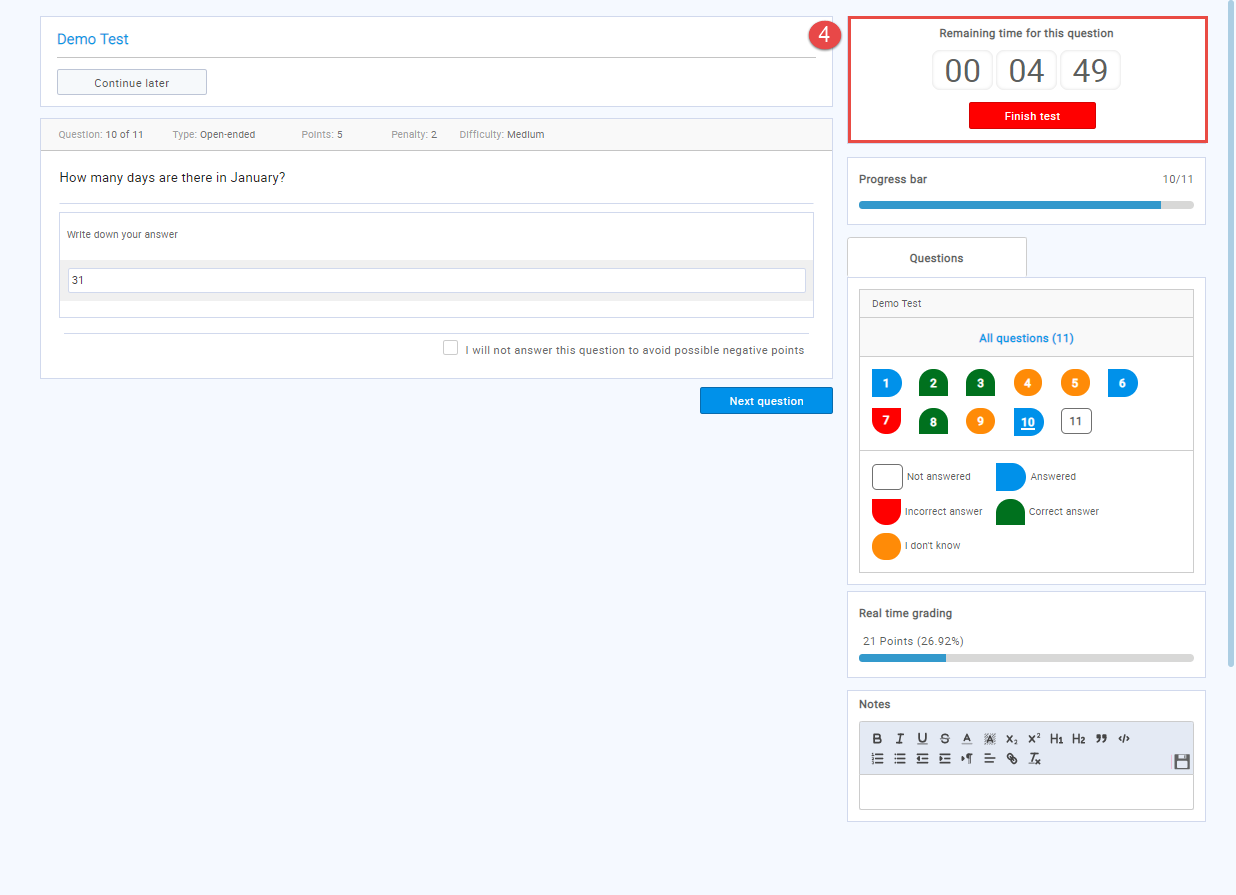
- Depending on the test options and the type of question, you can use these assistances:
- "Hint" - additional text that will help you answer the question.
- "Additional time" - extra time to answer the question.
- "Minus one wrong answer" - one wrong answer will be removed.
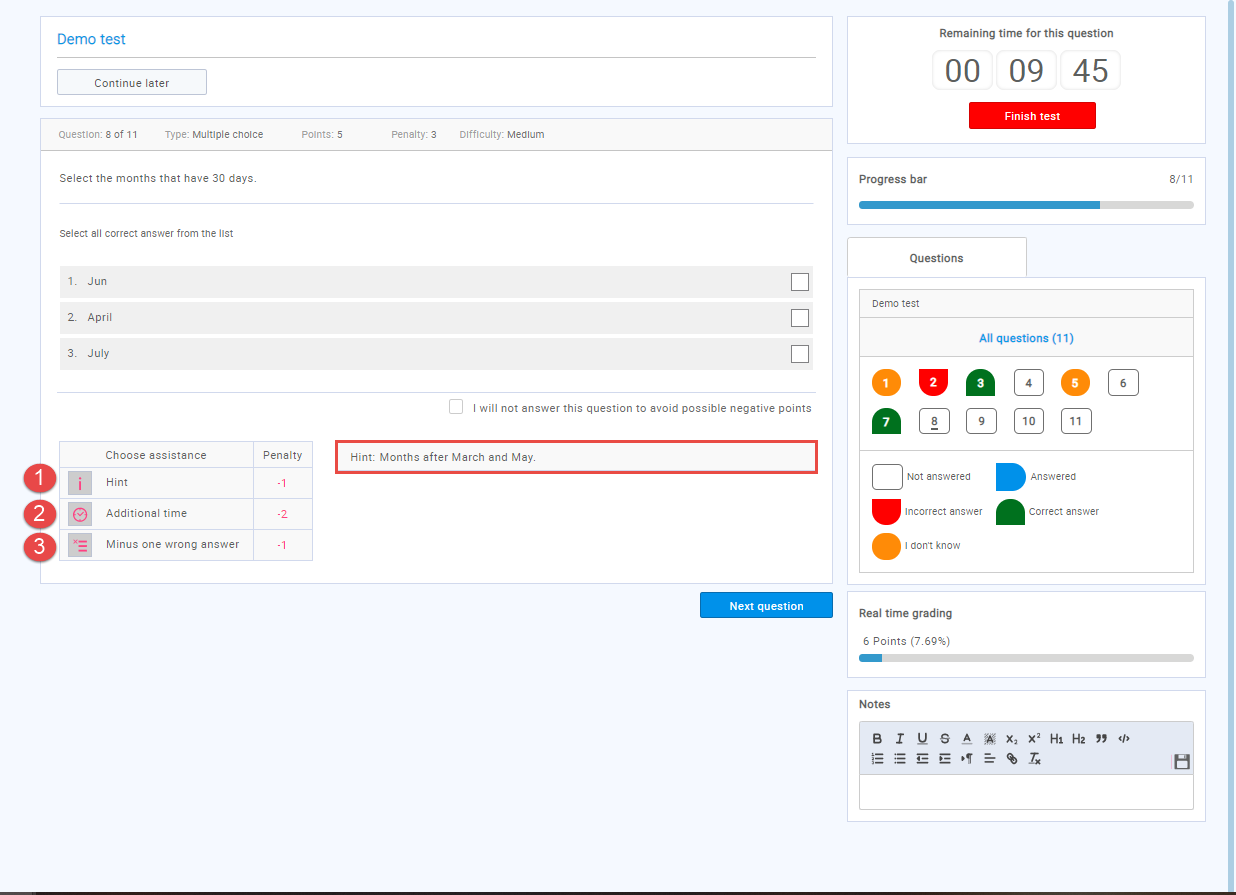
Note: Using assistances will change the number of points you have earned if they carry penalty points:
- If you use assistance and answer the question correctly -
the total number of points you have achieved will be reduced by the assistance penalty points.
- If you use assistance and answer incorrectly -
the total number of points you have achieved will be reduced by both assistance and question penalty points.
- If you use assistance and choose to skip the question - you will achieve 0 points regardless of the penalty points.
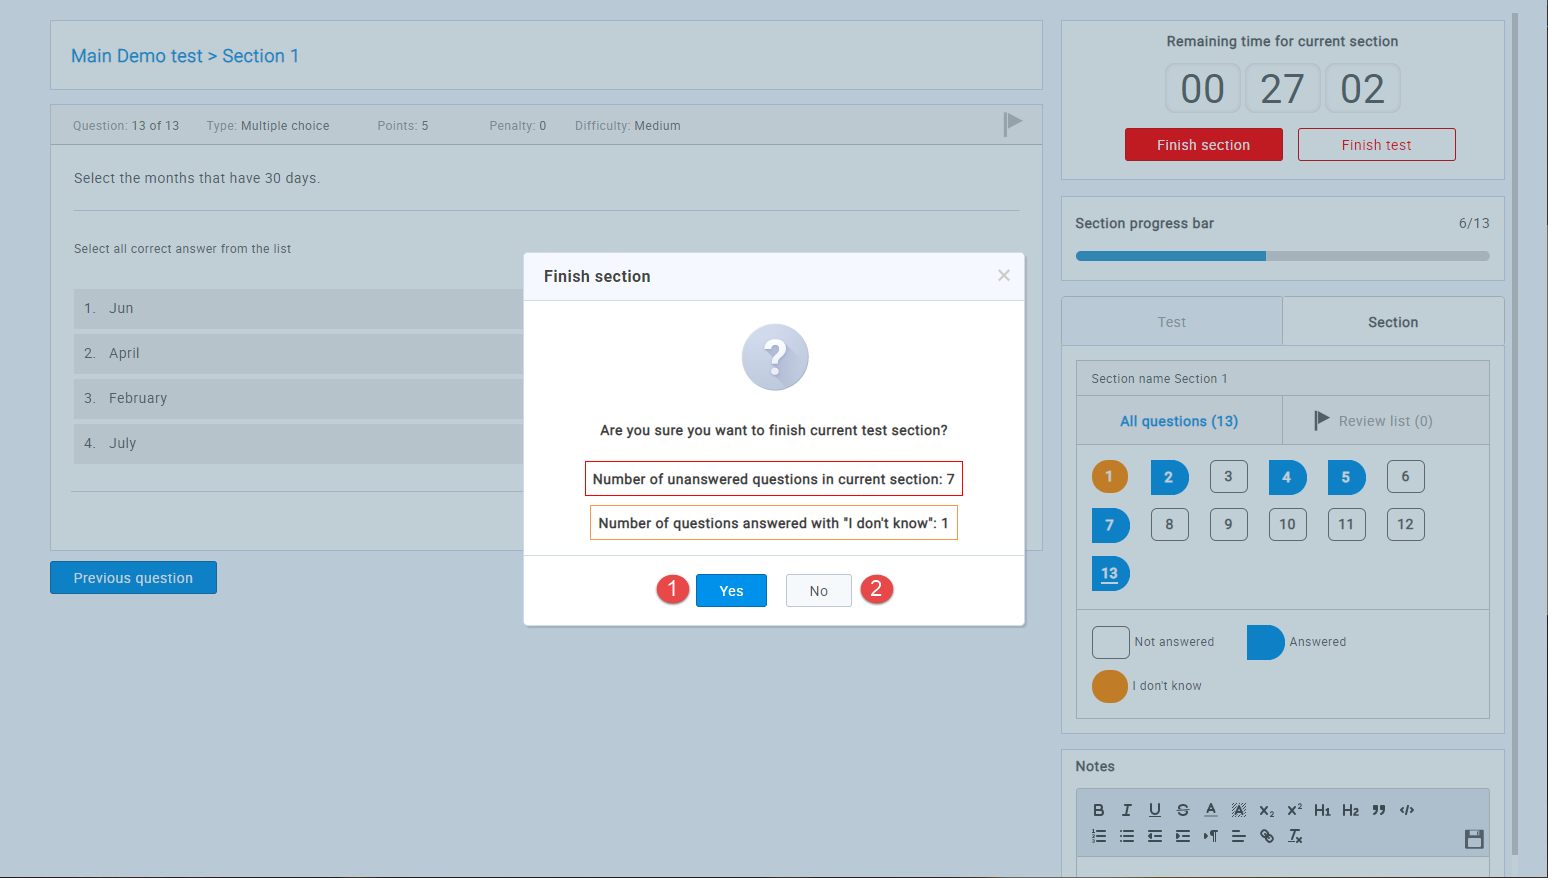
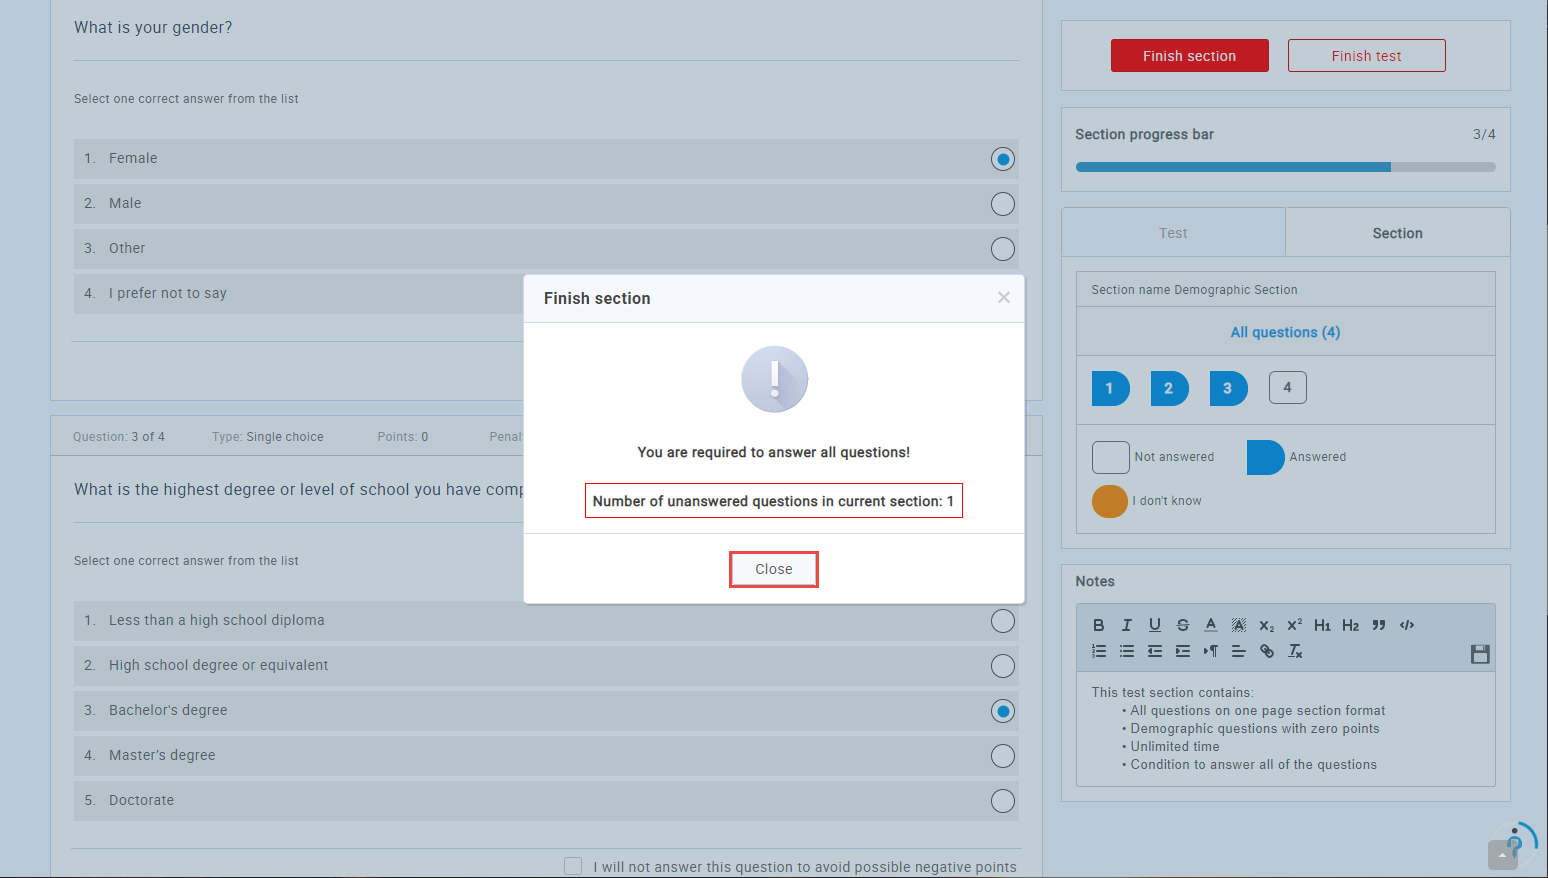
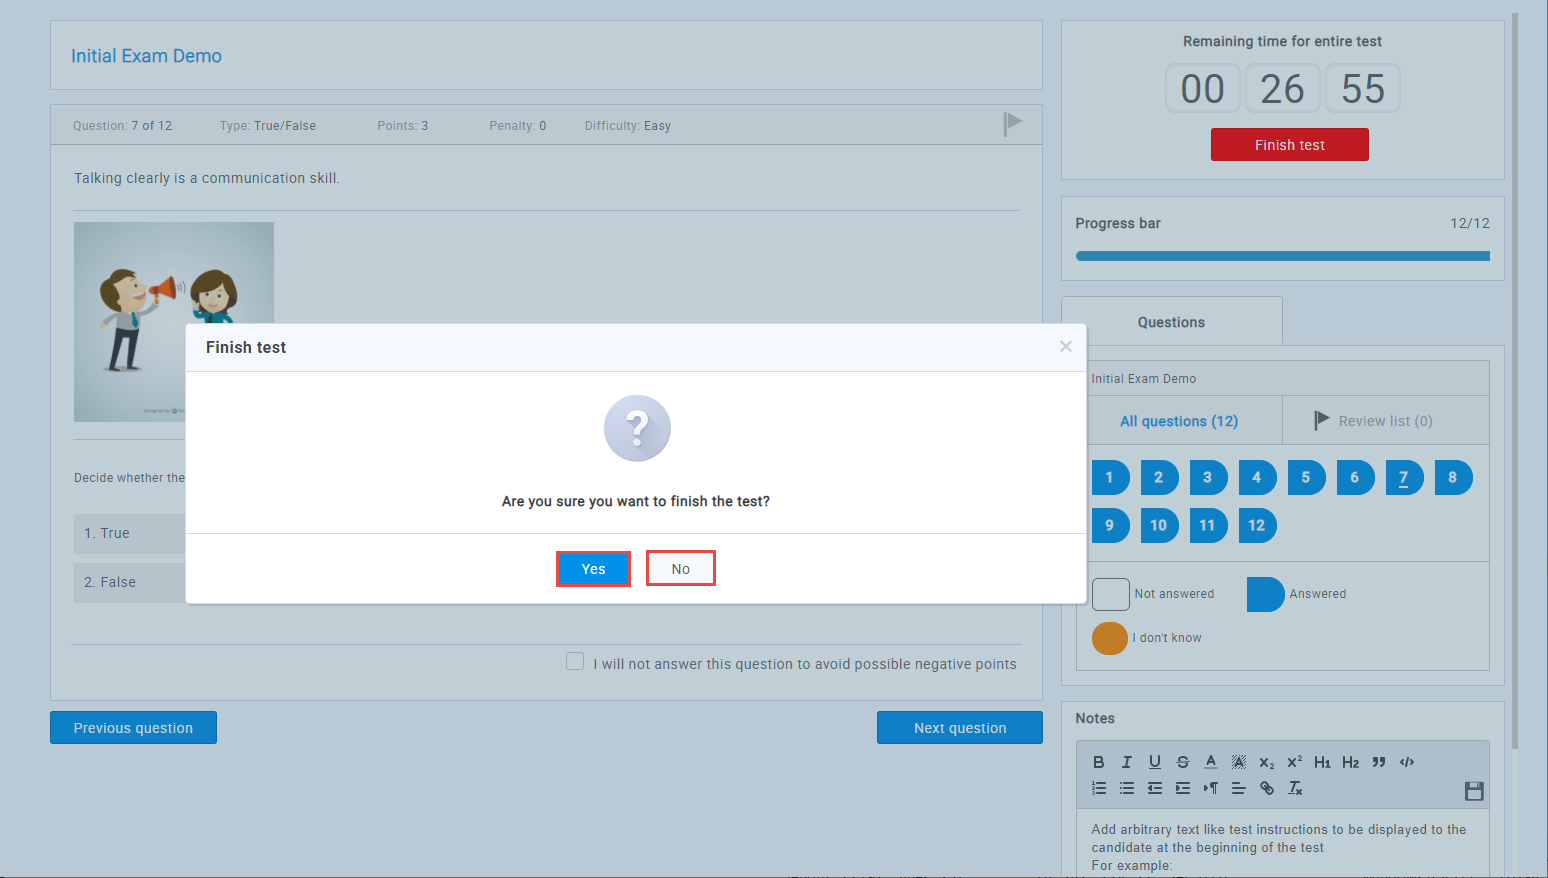
After clicking the button to complete the test, a window may appear:
- To inform you that you have unanswered questions, and questions you have skipped in the test/section.
- To inform you that you have unanswered questions you must answer. Click the "Close" button to answer the remaining questions.
Note: This will happen if the option that requires answering all questions was enabled during test creation.
- To ask you if you are sure you want to finish the test. If you are certain click the "Yes" button or if you want to check your answers again, click the "No" button to return to the test.
Click the "Yes" button to finish the test regardless of the unanswered questions or "No" button to return to the questions.
Once you have completed the test, you can review your report by clicking the "Open" option in the "My assignments" tab. For more information on report's content, please visit the Personal report help section.
Note: The only difference is that, as a student, you do not have permission to rate the questions.

